How to Use a Hollow Bit for Woodworking Projects?
Hollow Bits are essential for woodworking projects, especially when creating clean and precise holes. These tools have a unique design, allowing for efficient drilling through various wood types. Using a hollow bit can simplify tasks like making dowel joints or inlays. However, using them effectively requires practice and understanding.
When you start, select the right hollow bit size for your project. Each bit varies in diameter and depth, impacting your results. Familiarize yourself with the bit's cutting edges. They need to be sharp for best performance. A dull bit may cause splintering or unexpected tear-out. Pay attention to your drill speed as well. Too fast can lead to overheating and decreased accuracy.
Working with hollow bits can feel challenging. There will be moments of uncertainty, especially for beginners. It’s normal to experience trial and error in your projects. Reflect on your techniques and outcomes. This reflection will build your skills and enhance your woodworking results. Using hollow bits might not always yield perfection, but the journey will lead to improvement and creativity.
Understanding Hollow Bits and Their Uses in Woodworking
Hollow bits are essential tools in woodworking. They create clean, precise holes for dowels or pegs. These bits allow for a hollowed-out section in the wood. This technique is useful for various projects, from furniture to cabinetry. Using hollow bits can seem easy, but achieving the right depth takes practice.
To use a hollow bit effectively, start with a stable surface. Mark the spot clearly where you intend to drill. Sometimes the drill wanders, leading to uneven holes. It's crucial to control the pressure and speed while drilling. Rushing can lead to mistakes. Ensure you’re using the right size for your project. A bit that’s too large can damage your wood.
Cleaning the bit regularly is also important. Sawdust can build up quickly, affecting performance. Don’t forget to check the sharpness of the hollow bit. A dull bit can produce rough edges, which are hard to fix. Remember, practice helps refine your technique. You might face challenges, but overcoming them can be rewarding.
Selecting the Right Hollow Bit for Your Project Needs
When selecting a hollow bit for woodworking, precision and purpose are key. A study by the American Woodworking Association reveals that using the correct drill bit can reduce project time by up to 30%. This underscores the importance of choosing a hollow bit that suits your specific task.
Consider the size of the hollow bit, which should align with your desired hole diameter. For instance, a 1-inch bit is ideal for chair legs, while a smaller 3/8-inch bit works well for cabinetry. It’s crucial to assess the type of wood too. Softwoods usually require less aggressive bits, while hardwoods need sharper, more robust designs. Using the wrong bit can lead to tear-out or burn marks, highlighting the need for careful selection.
Pay attention to the hollow bit's flute design. Flutes that are too shallow can clog, while overly aggressive shapes may splinter your wood. A report by the Woodworking Institute suggests that a 40% increase in bit speed can enhance cutting efficiency. However, speeding through cuts can compromise precision and lead to mistakes. It’s essential to strike a balance between speed and accuracy for the best results.
Preparing Your Woodwork Material for Hollow Bit Use
When preparing your woodwork material for hollow bit use, the first step is to choose the right type of wood. Softwoods are easier to work with, but hardwoods offer durability. Inspect the grain direction before starting. This can influence the hollow bit's performance. If the wood has knots or defects, it may splinter during the process.
Next, ensure the wood is clean and dry. Dust and debris can interfere with the bit's functionality. A smooth surface helps in achieving cleaner cuts.
It's essential to measure and mark where you plan to use the hollow bit. Precision is key. Mistakes during this phase can lead to frustrating results. Sometimes, the hollow bit may wander off the mark, especially on uneven surfaces. Regularly check your alignment before drilling. Adjusting your technique may be needed if you’re not getting desired results.
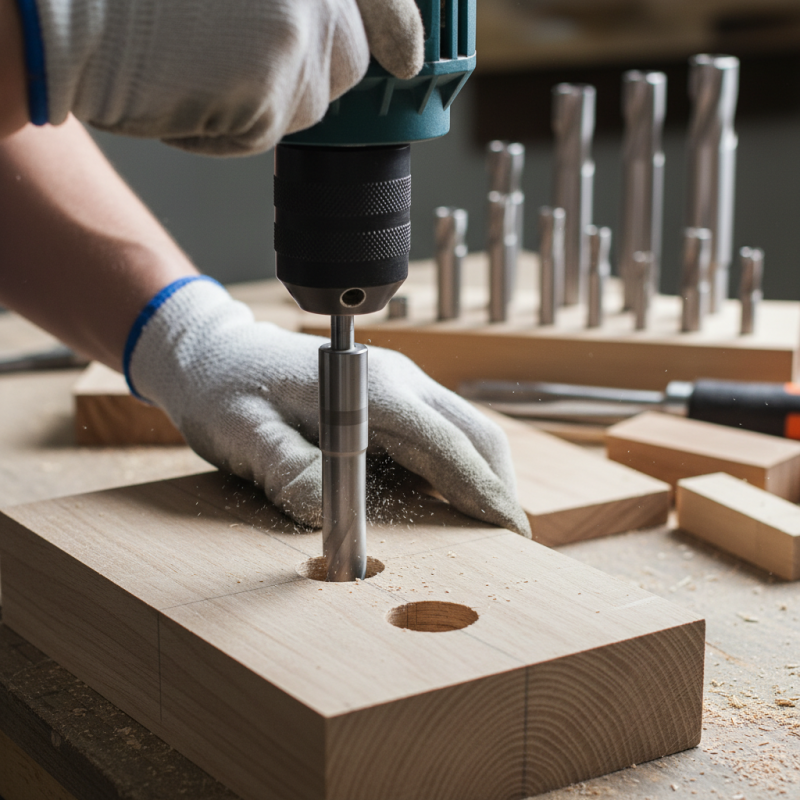
Step-by-Step Guide to Using a Hollow Bit Safely
Using a hollow bit in woodworking can enhance your projects significantly. However, safety must always come first. Always wear protective eyewear and a dust mask. Wood debris can cause serious injury. A National Institute for Occupational Safety and Health report highlights that proper gear reduces workplace injuries by up to 50%.
Before starting, ensure your drill is set correctly. The hollow bit should be securely attached. Test it on scrap wood first. This helps avoid deep errors on your final piece. Use a slower drill speed to prevent overheating. Excessive heat can dull the bit quickly. It's also essential to keep the bit clean; chips can obstruct progress.
Tips: Always maintain focus while drilling. Distractions can lead to mistakes. Additionally, check the depth settings. Missing this step can compromise your design. Practice using different materials. It builds your skill set and confidence. Mistakes will happen; reflect on them and learn. Adjust your technique based on past errors. This approach improves your overall craft.
Tips for Maintaining and Storing Hollow Bits After Use
After using hollow bits, proper maintenance is essential. Clean the bits immediately to prevent resin buildup. Use a soft brush or cloth to wipe off any debris. If necessary, soak them in warm soapy water. Avoid harsh chemicals, as they can damage the finish. Rinse thoroughly and dry them with a towel or air dry. This quick action helps keep your bits sharp and effective.
Storing hollow bits requires careful consideration. A protective case or drawer is ideal. Avoid leaving them exposed to moisture or dust. Label the storage area clearly for easy access. It's also wise to monitor for any signs of rust or damage. Regularly inspect your bits. If you find rust, a light rub with fine steel wool may help.
Sometimes, a bit might seem dull after a few uses. This could be due to improper storage or maintenance. Reflecting on your storage methods can lead to better practices in the future. Even small details, like ensuring they are not stacked improperly, matter. Both maintenance and storage will prolong the life of your hollow bits, ensuring they serve you well in your woodworking projects.